

A lot of Gnome Shell fans have been waiting to install Gnome Shell 3.2 in Ubuntu 11.10, which they could not do in Ubuntu 11.04 due to a compatibility issues. Gnome Shell works wonderfully in the new Ubuntu release and I am sure a lot of you will fall in love with the interface.
I will provide a quick, technical way to install Gnome Shell in Ubuntu 11.10. Although the basic packages are available in the Ubuntu repositories, after installation, I found them to be either broken or unresponsive. So, I have compiled a few steps to make the Gnome Shell installation as smooth as possible.
By the way, I would recommend everyone to use the terminal as it reduces the work of installation by more than 50%.
1. Install a few extra repositories:
sudo add-apt-repository ppa:gnome3-team/gnome3
sudo add-apt-repository ppa:ricotz/testing
sudo add-apt-repository ppa:webupd8team/gnome3
2. Update the repositories
sudo apt-get update
3. Install the packages
sudo apt-get install gnome-shell gnome-tweak-tool synaptic gnome-shell-extensions* gnome-sushi gnome-documents gnome-contacts evolution
4. Logout
5. Select Gnome from the login menu, enter your password and login to a brand new Gnome Shell interface.
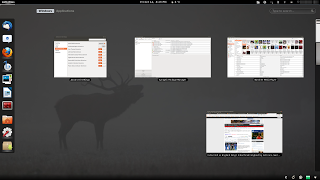
 |
| Gnome Shell in Ubuntu 11.10 |
One might question the requirement of evolution and gnome-contacts, sushi and documents. Let me tell you, these applications are required to make the full use of online accounts feature present in Gnome 3.2
6. Activate the extensions from gnome-tweak tool. The application is installed with the name Advanced Settings. Go to Shell Extensions and drag the buttons to turn on/off extension. Pretty cool!!
 |
| Gnome Teak tool interface |
works not under Ubuntu 11.10
Einige Pakete konnten nicht installiert werden. Das kann bedeuten, dass
Sie eine unmögliche Situation angefordert haben oder, wenn Sie die
Unstable-Distribution verwenden, dass einige erforderliche Pakete noch
nicht erstellt wurden oder Incoming noch nicht verlassen haben.
Die folgenden Informationen helfen Ihnen vielleicht, die Situation zu lösen:
Die folgenden Pakete haben unerfüllte Abhängigkeiten:
gnome-shell-extensions : Kollidiert: gnome-shell-extensions-alternate-tab aber 3.2.0-2~webupd8~oneiric soll installiert werden
Kollidiert: gnome-shell-extensions-alternative-status-menu aber 3.2.0-2~webupd8~oneiric soll installiert werden
Kollidiert: gnome-shell-extensions-apps-menu aber 3.2.0-2~webupd8~oneiric soll installiert werden
Kollidiert: gnome-shell-extensions-auto-move-windows aber 3.2.0-2~webupd8~oneiric soll installiert werden
Kollidiert: gnome-shell-extensions-dock aber 3.2.0-2~webupd8~oneiric soll installiert werden
Kollidiert: gnome-shell-extensions-drive-menu aber 3.2.0-2~webupd8~oneiric soll installiert werden
Kollidiert: gnome-shell-extensions-gajim aber 3.2.0-2~webupd8~oneiric soll installiert werden
Kollidiert: gnome-shell-extensions-native-window-placement aber 3.2.0-2~webupd8~oneiric soll installiert werden
Kollidiert: gnome-shell-extensions-places-menu aber 3.2.0-2~webupd8~oneiric soll installiert werden
Kollidiert: gnome-shell-extensions-system-monitor aber 3.2.0-2~webupd8~oneiric soll installiert werden
Kollidiert: gnome-shell-extensions-user-theme aber 3.2.0-2~webupd8~oneiric soll installiert werden
Kollidiert: gnome-shell-extensions-windows-navigator aber 3.2.0-2~webupd8~oneiric soll installiert werden
Kollidiert: gnome-shell-extensions-workspace-indicator aber 3.2.0-2~webupd8~oneiric soll installiert werden
Kollidiert: gnome-shell-extensions-xrandr-indicator aber 3.2.0-2~webupd8~oneiric soll installiert werden
E: Probleme können nicht korrigiert werden, Sie haben gehaltene defekte Pakete.
Hello Gerhard ,
try
sudo apt-get install -f
Then try to install gnome shell first
sudo apt-get install gnome-shell gnome-tweak-tool
After that install the other extenstions.
Herr Gerhard,
Folgen Sie bitte NICHT was Tuxtrix vorgeschlagen hat. Ich hab's gemacht, und jetzt sieht alles aus, als ob ich ganz neu gestarted haette. Meine Einstellungen sind verloren, und ich weiss nicht ob ich alles reparieren kann…
I followed the advice you gave him, because I was having a similar problem, and now EVERYTHING is messed up. I can't change my background, my settings/shortcuts have all been lost, etc. Is there a way to undo that step? Or am I going to have to install a clean distro? I really don't want to do that.
Update: I launched Unity (I'm running Ubuntu 11.10, if that's not obvious) and all of my settings have been retained. Is there a way to simply revert Gnome back to how it ships with Unity? I have lots of nice shortcuts and whatnot set up, I'd hate to do a fresh install of a distro and lose everything.
Hi Zac,
If you have logged into gnome-shell, you must remember that the desktop and icons are disabled by default on gnome-shell.
Open gnome-tweak tool and enable the option to control your desktop. All of your shortcuts will be available again.
I was going to but the full install cmd. threw errors, so I tried just " install gnome-shell, and it wanted 2 uninstall cheese && cinammon desktop which I like a Lot…so I decided 2 wait 4 12.04 so I will get Unity 5.0 && gs 3.2 @ the same time….I am really hoping Ubuntu 12.04 will b able to write to my Iomega drive, because 4 now I go 2 kubuntu 2 xfer files out of the machine…although it has caused me 2 fall in <3 w/ kubuntu just as much as Ubuntu…
I have Iomega drive and Ubuntu 11.10 can write to it without issues! Did you install ntfs-config?