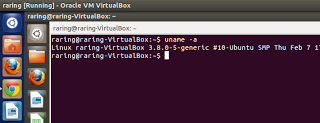
 Oracle’s VirtualBox comes with support for a default display driver to boot up any Linux OS. If, however, you want to use 3D effects or use Ubuntu’s Unity under VirtualBox without any lag, you would need to install the guest additions package. Installing this package is very easy uptill Ubuntu 12.10, can be accomplished in just a few clicks. However, if you are looking to take the new, under heavy development, Raring Ringtail (Ubuntu 13.04) , out for a spin in VirtualBox, you would need to get your hands dirty!
After you install Ubuntu 13.04 , start the VM and try installing the guest additions package. You will see, the installation does not complete. It throws up errors saying that the Kernel 3.8 is not supported. This is because the VBoxGuest-linux.c file, which is used for compiling and installing the guest additions is missing some arguments which helps to recognize the new kernel. The aim here, is to patch it, manually, by following the steps which I have detailed below. I have tried to make this tutorial as simple to follow as possible, but you will require some patience.
The steps below worked for me(Ubuntu Raring x64, kernel 3.8.0-5), running on VirtualBox 4.2.6 and Ubuntu 12.04(host machine).
1) Remove older version of VirtualBox guest additions, version older than 4.22, in:
/usr/src and in /var/lib/dkms
Check the following folders, you should have something similar to what’s given below
ls /usr/src/
linux-headers-3.8.0-5 linux-headers-3.8.0-5-generic vboxguest-4.2.6
ls /var/lib/dkms/
dkms_dbversion vboxguest
ls /var/lib/dkms/vboxguest/
4.2.6 kernel-3.8.0-5-generic-x86_64
2) Check for valid softlink
ls -al /usr/src/vboxguest-4.2.6
lrwxrwxrwx 1 root root 49 Jan 24 17:28 /usr/src/vboxguest-4.2.6 -> /opt/VBoxGuestAdditions-4.2.6/src/vboxguest-4.2.6
3) Now manually apply the patch to the file VBoxGuest-linux.c which is located at /opt/VBoxGuestAdditions-4.2.6/src/vboxguest-4.2.6/vboxguest/VBoxGuest-linux.c
Steps required :
i) Open the file using vi or any of your favourite text editors. I have used vi.
sudo vi /opt/VBoxGuestAdditions-4.2.6/src/vboxguest-4.2.6/vboxguest/VBoxGuest-linux.c
ii) now, head over to line no 199 by giving the command :199
iii) Press i to go into the insert mode and replace this line static const struct pci_device_id __devinitdata g_VBoxGuestPciId[] =
with
static const struct pci_device_id
#if LINUX_VERSION_CODE < KERNEL_VERSION(3, 8, 0)
__devinitdata
#endif
g_VBoxGuestPciId[] =
iv) Save and Exit out by pressing :wq!
4) Now, run this one-liner to rebuild all dkms modules
ls /var/lib/initramfs-tools | sudo xargs -n1 /usr/lib/dkms/dkms_autoinstaller start
5) After the build is complete, restart the VM to enjoy using Unity without any lag.
If you want to check that the driver is being used head over to : Software Updater ->
Settings -> Additional Drivers .. You will see “InnoTek VM …” in use. (Thanks to Marius Dalacu)
Troubleshooting
Settings -> Additional Drivers .. You will see “InnoTek VM …” in use. (Thanks to Marius Dalacu)
Troubleshooting
1. If your /opt/VBoxGuestAdditions-4.2.6/src/vboxguest-4.2.6/vboxguest/VBoxGuest-linux.c is empty, try installing first without making any changes. Once the compilation fails, you can try again. Also, please make sure to install guest addition drivers from the downloaded .iso file available from VirtualBox application (Devices ->Guest Additions) and not from Ubuntu’s repository.


Thank you so muck for this! It is working perfectly.
Some small things that you should add to your tutorial:
1. First thing make sure that there are no older kernel versions instald because step 4 from the tutorial will build the module for the wrong kernel verision.
2. When all is over, check that the driver is used: Software Updater – Settings – Additional Drivers, Select InnoTek.. and click Apply Changes. Reboot vm. Enjoy.
Thak you again.
Thank you for your comments. When you say older kernels, how old ? Since Ubuntu 13.04 dev version is using no less than 3.8, I think it will be fine. Nevertheless, its a good point
Hi, the last kernel is 3.8.0.7 and if I had also installed an older kernel update (3.8.0.4) then dkms will build the m9dule for that version.
I have tested this late at night and, belive it or not, i didn't notice that the windows decorations are missing. Any ideas? Everything else is working properly and hw accelerated.
Thanks.
After today Ubuntu updates, windows decorations are back and now 13.04 is running full speed inside VBox. A happy man! 🙂
Hello. I just have one problem. I Can't enable the additional drivers in the Software Sources. but guest additions installed perfectly with no error. and Ubuntu is running fine as well.